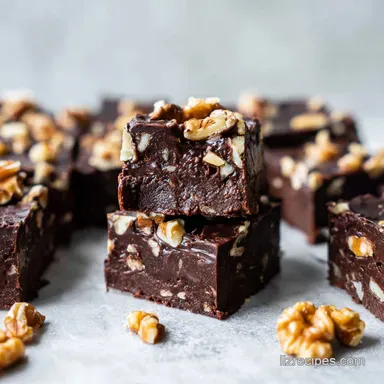
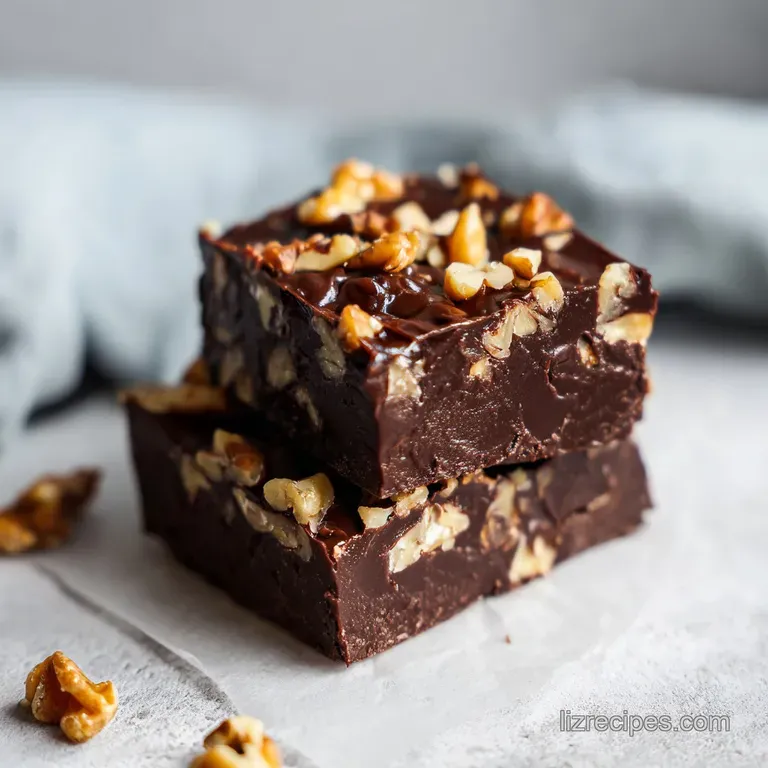
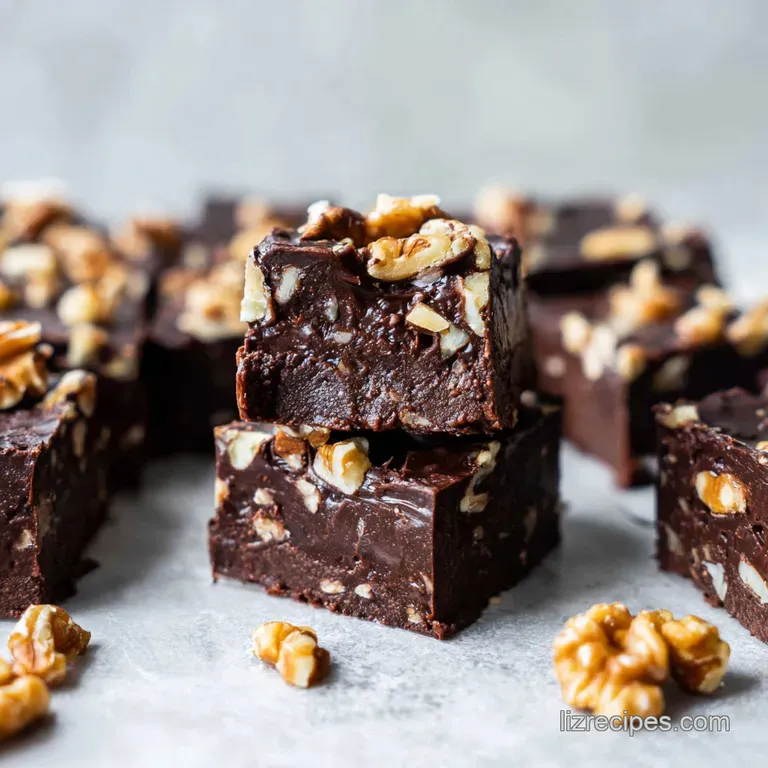
Original Fantasy Fudge: Rich and Velvety
- Time: 5 min active + 5 min cook + 2 hours chilling = Total 2 hours 10 mins
- Flavor/Texture Hook: Velvety smooth with a slight chocolatey shatter
- Perfect for: Holiday gift platters, beginner bakers, or sudden sugar cravings
- Fantasy Fudge
- Why This Method Works
- Component Analysis
- Essential Ingredients List
- Required Kitchen Tools
- Step-by-Step Cooking Guide
- Common Troubleshooting Fixes
- Custom Flavor Variations
- Scaling Your Batch
- Truths About Fudge Making
- Storage and Waste Tips
- Best Serving Pairings
- Recipe FAQs
- 📝 Recipe Card
The scent of boiling sugar is something you never forget, that sweet, almost toasted aroma that fills the kitchen just before the chocolate hits the pan. I remember the first time I tried to make fudge the old-fashioned way, spending an hour hovering over a pot with a candy thermometer, praying I wouldn't overshoot the soft ball stage by one degree.
It was stressful, sticky, and honestly, a bit of a mess.
Then I found out you don't actually need all that gear. Forget the idea that high end confectionery requires a lab grade setup or hours of constant stirring. You just need a timer and a heavy pot.
This approach to Fantasy Fudge strips away the anxiety of traditional candy making while keeping that rich, melt in-your mouth quality we all crave.
You can expect a treat that is significantly lighter than those dense, clay like blocks you find at some specialty shops. Because we use marshmallow creme, the result is more of a hybrid between a truffle and a classic fudge.
It's an original fantasy fudge easy enough for a Tuesday night but impressive enough for a Christmas party.
Fantasy Fudge
The first thing you'll notice is the texture. It doesn't fight back when you bite into it; it just gives way into a silky, chocolatey cloud. I've shared this specific version with friends who swear they can't bake, and they've all nailed it because there's no guessing game involved.
You aren't watching for a "peak" or a "thread" - you're just watching the clock.
When you're making an original fantasy fudge homemade version, the goal is to achieve a balance where the chocolate is the star, but the marshmallow creme provides a structural lightness. It’s that specific contrast that makes this a staple in so many households.
Trust me, once you see how fast it comes together, you'll never go back to the four hour stirring method.
Right then, let's get into why this works. Most people think fudge is about temperature, but it's actually about the size of the sugar crystals. By boiling the sugar and butter for a specific window of time, we're prepping the base to hold onto the chocolate and marshmallow without turning into a grainy mess.
Why This Method Works
- Controlled Crystallization: Boiling the sugar for exactly five minutes ensures the crystals are small enough to be undetectable on the tongue, preventing that "sandy" feel.
- Fat Stabilization: The butter prevents the sugar from clumping too quickly and adds a velvety mouthfeel that cuts through the sweetness.
- Air Incorporation: The marshmallow creme introduces tiny air bubbles, which is why this doesn't feel as heavy as traditional cocoa powder fudges.
- Temperature Buffer: Adding chocolate chips after the boil allows the residual heat to melt the cocoa butter without scorching the chocolate.
- Rapid Set: The high sugar concentration combined with refrigeration creates a stable matrix that holds its shape at room temperature.
| Feature | Traditional Fudge | Fantasy Fudge | Impact |
|---|---|---|---|
| Equipment | Candy Thermometer | Kitchen Timer | Much easier setup |
| Texture | Dense and Heavy | Light and Velvety | Better mouthfeel |
| Active Effort | Constant Stirring | Minimal Mixing | Less kitchen stress |
| Setting Time | Slow Cooling | Rapid Chilling | Faster results |
Component Analysis
| Ingredient | Science Role | Pro Secret |
|---|---|---|
| Granulated Sugar | Structure & Sweetness | Don't stir during the boil to avoid crystals |
| Marshmallow Creme | Aeration & Stability | Room temperature creme blends faster |
| Semi Sweet Chips | Flavor & Fat | Use high-quality chips for a deeper cocoa taste |
| Unsalted Butter | Emulsification | Prevents the sugar from becoming a hard candy |
Essential Ingredients List
For this recipe, we're sticking to a few reliable staples. I've found that using a microwave fantasy fudge recipe can be tempting, but the stovetop boil is what gives this particular version its signature stability.
- 2 cups (400g) granulated sugar Why this? Provides the essential structure and sweetness. (Substitute: Caster sugar for a slightly finer grain)
- 2 tbsp (28g) unsalted butter Why this? Adds richness and prevents sugar crystallization. (Substitute: Coconut oil for a dairy-free twist)
- 3 cups (510g) semi sweet chocolate chips Why this? The primary flavor and fat source. (Substitute: Dark chocolate for less sweetness)
- 1 jar (7 oz / 198g) marshmallow creme Why this? Creates the "fantasy" light texture. (Substitute: Thick marshmallow fluff)
- 1 tsp (5ml) pure vanilla extract Why this? Rounds out the chocolate notes. (Substitute: Almond extract for a nutty aroma)
- 1 cup (115g) chopped walnuts Why this? Adds a necessary salty crunch. (Substitute: Pecans or macadamias)
Required Kitchen Tools
You don't need a fancy kitchen to pull this off. In fact, keeping it simple is the point. I usually use a basic stainless steel pot, but a heavy bottomed one is better because it spreads the heat evenly.
If you have a stand mixer such as KitchenAid, you can use it for the final fold, but a sturdy spatula is all you really need.
Make sure your 8x8 inch baking pan is properly greased. I prefer using a bit of butter or a non stick spray, but lining the pan with parchment paper is a lifesaver if you want to lift the whole block out for cleaner slicing.
Step-by-step Cooking Guide
Let's crack on with the process. The most important part here is the timing - don't let your mind wander during those five minutes of boiling!
- Combine the granulated sugar and unsalted butter in a heavy bottomed saucepan over medium heat. Stir constantly until the butter is completely melted and blended with the sugar.
- Bring the mixture to a full rolling boil. Note: A rolling boil is one that doesn't stop bubbling even when you stir it.
- Boil the sugar mixture for exactly five minutes. Set a timer to ensure you don't overcook it into a hard candy.
- Remove the pan from the heat immediately.
- Quickly stir in the semi sweet chocolate chips. Stir until the chips are fully melted and the mixture looks glossy and smooth.
- Stir in the marshmallow creme and vanilla extract. Mix until no white streaks remain and the color is uniform.
- Gently fold in the chopped walnuts. Use a folding motion to ensure the nuts are evenly distributed without deflating the air from the marshmallow.
- Pour the mixture into a greased 8x8 inch baking pan. Smooth the top with a spatula until it's level.
- Let the fudge sit at room temperature for 30 minutes.
- Move the pan to the refrigerator and chill for at least 2 hours. Slice into 1 inch squares using a sharp knife.
Chef's Note: For the cleanest cuts, dip your knife in hot water and wipe it dry between every single slice. It prevents the fudge from sticking and gives you those sharp, professional edges.
Common Troubleshooting Fixes
Even with an original fantasy fudge recipe, things can sometimes go sideways. Usually, it comes down to the boil or the temperature of the ingredients.
| Issue | Solution |
|---|---|
| Why Your Fudge Is Too Soft | If your squares are slouching or feeling more like ganache than fudge, you likely didn't hit a full rolling boil or you pulled it off the heat too early. The sugar needs that exact five minute window |
| Why Your Fudge Is Grainy | Graininess usually happens if the sugar wasn't fully dissolved before the boil, or if you stirred too vigorously during the boiling phase, which can encourage large crystal growth. It can also happen |
| Why Your Fudge Is Greasy | A greasy film on top usually means the chocolate was overheated. If you keep the pan on the burner while stirring in the chips, the cocoa butter can separate from the solids. Always remove the pan fro |
Common Mistakes Checklist
- ✓ Did you use a rolling boil, not just a simmer?
- ✓ Was the timer set for exactly 5 minutes?
- ✓ Did you remove the pan from the heat before adding chips?
- ✓ Was the pan properly greased to prevent sticking?
- ✓ Did you wait the full 2 hours for the chill?
Custom Flavor Variations
Once you've mastered the original fantasy fudge recipe marshmallow creme base, you can start playing with the additions. The beauty of this recipe is that the base is very forgiving.
For a Peppermint Twist Swap the vanilla extract for a half teaspoon of peppermint extract and add a handful of crushed candy canes during the final fold. It transforms the dish into a holiday classic.
For a Salted Caramel Profile Stir in a tablespoon of sea salt and replace the walnuts with toasted pecans. If you're feeling fancy, swirl in two tablespoons of store-bought salted caramel sauce right before you smooth the top of the pan.
For a Nut Free Version Simply omit the walnuts. To keep that textural contrast, you can add mini marshmallows or dried cranberries. The original fantasy fudge quick method works perfectly without the nuts.
For a Dark Chocolate Version Use 70% cocoa dark chocolate chips. Because dark chocolate is less sweet than semi sweet, you might find it tastes more sophisticated and less like a "candy bar".
Scaling Your Batch
If you're making this for a huge crowd, you can double the recipe, but be careful.
Scaling Up (2x) When doubling, use a much larger pot to ensure the sugar has room to boil. Don't double the boil time - keep it at five minutes, as the volume of sugar doesn't change the chemistry of the boiling point.
I recommend using two 8x8 pans instead of one large one to ensure the chilling time remains the same.
Scaling Down (½) If you only want a small treat, you can halve the ingredients. Use a loaf pan instead of a square pan. Reduce the cooling time slightly, but still give it at least 2 hours in the fridge.
Since you're using half an egg's worth of butter (1 tbsp), just be extra careful not to burn the sugar, as smaller amounts evaporate faster.
| Method | Effort | Texture | Best For |
|---|---|---|---|
| Stovetop Boil | Medium | Velvety | Large batches/Gifts |
| Microwave | Low | Slightly Softer | Quick cravings |
| Slow Cooker | Very Low | Dense | Hands off prep |
Truths About Fudge Making
There are a few things people tell you about fudge that just aren't true. Let's clear the air.
First, you don't need a candy thermometer to get professional results. While they're great for jam or hard candy, the "timer method" used in this original fantasy fudge recipe is just as reliable for this specific texture.
Second, some people think using marshmallow creme is "cheating". It's not cheating; it's smart chemistry. The creme acts as a stabilizer and an aerator, which is why the texture is so much lighter than the old school versions that require hours of beating.
Storage and Waste Tips
To keep your fudge fresh, store it in an airtight container. It stays great in the fridge for about two weeks. If you're not planning to eat it soon, you can freeze it for up to three months. Just wrap the squares individually in parchment paper so they don't stick together in a giant chocolate brick.
When you thaw it, let it come to room temperature slowly in the fridge to avoid condensation on the surface, which can make it sticky.
As for zero waste, don't scrub the pan immediately. Use a rubber spatula to scrape every last bit of chocolate out of the pot. If there's a layer of burnt sugar on the bottom of the pan, just fill it with water and bring it to a boil - the sugar will dissolve instantly, making cleanup a breeze.
Best Serving Pairings
Because this is a very rich dessert, you want to pair it with things that cut through the sweetness. A bitter espresso or a strong black tea is the gold standard here. The acidity of the coffee balances the sugar and makes the chocolate flavor pop.
If you're serving it on a platter, add some fresh raspberries or sliced strawberries. The tartness of the berries prevents the fudge from feeling too heavy. I also love serving a square of this alongside a sharp cheddar cheese - trust me on the salty sweet combo, it's a total winner.
Whether you're making the original fantasy fudge for a bake sale or just for your own midnight snack, it's the most effortless way to get that classic taste without the stress. Let's get cooking!
Recipe FAQs
Can I freeze this fudge?
Yes, for up to three months. Wrap the squares individually in parchment paper so they do not stick together in the freezer.
How to achieve a full rolling boil?
Stir the sugar and butter mixture while it bubbles. If it continues to bubble vigorously even while you are stirring, it has reached a full rolling boil.
Is it true I can shorten the five minute boil time to save effort?
No, this is a common misconception. You must boil the mixture for exactly five minutes to ensure the fudge sets properly.
How to set the fudge before slicing?
Cool the pan at room temperature for 30 minutes. After that, refrigerate the fudge for at least 2 hours before cutting it into 1 inch squares.
Can I omit the chopped walnuts?
Yes, they are optional. Simply skip the folding step if you prefer a smooth fudge without nuts.
Why is my fudge sticky after thawing?
It likely thawed too quickly. Let the fudge come to room temperature slowly in the fridge to avoid condensation on the surface.
How to prevent the fudge from sticking to the pan?
Grease an 8x8 inch baking pan before pouring. This ensures the fudge releases easily after the chilling process.
Fantasy Fudge Recipe