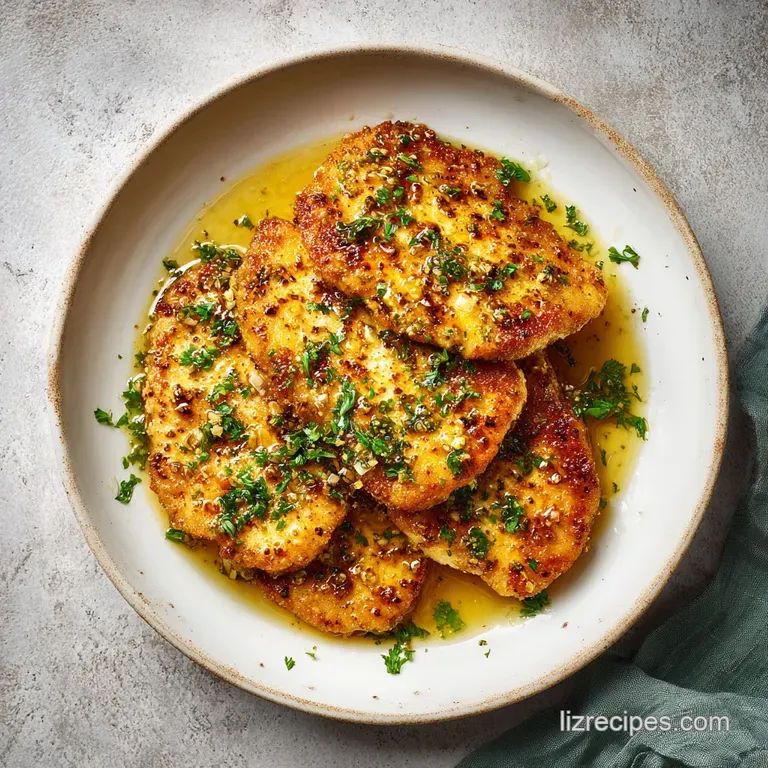
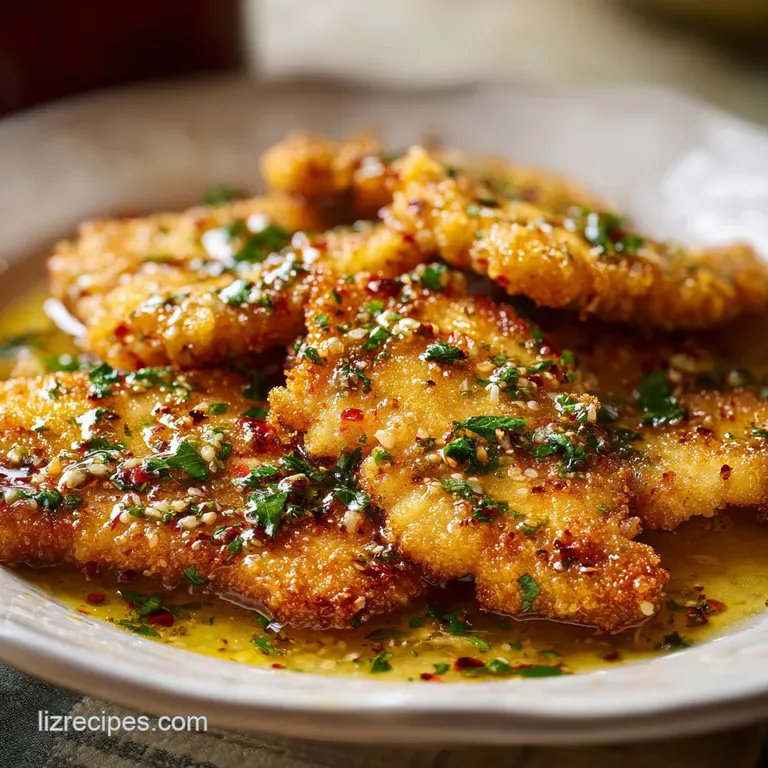
Easy Onepan Garlic Butter Chicken: Mahogany Crust
- Time: 10 min prep + 15 min cook = Total 25 mins
- Flavor/Texture Hook: Mahogany crust with a velvety, zesty butter finish
- Perfect for: Weeknight dinners, budget-friendly hosting, beginner cooks
- Easy Onepan Garlic Butter Chicken
- The Hidden Kitchen Secrets
- The Component Analysis
- Essential Ingredient List
- Necessary Kitchen Gear
- Step-by-Step Cooking Guide
- Avoiding Common Blunders
- Customizing Your Meal
- Scaling Your Portions
- Fact Checking Kitchen Myths
- Storage and Waste Tips
- Best Serving Pairs
- High in Sodium
- Recipe FAQs
- 📝 Recipe Card
Easy Onepan Garlic Butter Chicken
The smell of garlic hitting hot butter is a universal signal that something good is happening in the kitchen. For me, this combination always brings back memories of Sunday lunches at my grandmother's place.
She didn't have a fancy culinary degree, but she knew that butter and garlic could make even the cheapest cut of meat taste like a luxury. It's that kind of "homestyle magic" where simple ingredients do all the heavy lifting.
In many Western kitchens, this style of pan searing is a rite of passage. It's about that transition from the sharp, raw scent of garlic to that nutty, toasted aroma that fills the whole house.
It's a comforting, grounding way of cooking that doesn't require expensive gadgets, just a heavy skillet and a bit of patience.
You can expect a meal that's punchy and bright. The lemon cuts through the richness of the butter, and the paprika gives the chicken a gorgeous, deep color without needing a deep fryer. This easy onepan garlic butter chicken is exactly what I turn to when I'm exhausted but still want a meal that feels like a treat.
The Hidden Kitchen Secrets
I used to think the "science" of cooking was just for people in white coats, but when you pay attention, it's actually just a series of habits. Here is what's actually happening in your pan:
- The Dry Surface: Moisture is the enemy of a crust. When the chicken is bone dry, the heat goes straight to browning the meat instead of boiling the water on the surface.
- Fat Layering: Using olive oil first allows us to sear at high heat. Butter has a lower smoke point and would burn if we used it for the initial sear, so we add it at the end for flavor.
- Acid Balance: The lemon juice isn't just for taste. It breaks down the heavy feeling of the butter on your tongue, making the whole dish feel lighter and zesty.
- Carry over Heat: Meat keeps cooking after you take it off the heat. Pulling the chicken at 160°F ensures it hits the safe 165°F mark while resting, so it doesn't turn into rubber.
| Method | Time | Texture | Best For |
|---|---|---|---|
| Stovetop | 25 mins | Velvety sauce, charred crust | Quick weeknights |
| Oven | 40 mins | Evenly cooked, softer edges | Larger crowds |
The Component Analysis
I've learned the hard way that not all ingredients are created equal. Here is why we use these specific items.
| Ingredient | Science Role | Pro Secret |
|---|---|---|
| Chicken Breast | Lean Protein | Slice into thin cutlets for faster, even cooking |
| Unsalted Butter | Flavor Carrier | Use unsalted so you can control the seasoning exactly |
| Fresh Garlic | Aromatic Base | Mince just before cooking to keep the oils potent |
| Lemon Juice | pH Balancer | Always use fresh; bottled juice tastes metallic here |
Essential Ingredient List
Since we're keeping this budget friendly, you probably have most of this in your pantry. If you don't, most of these have easy swaps that won't ruin the vibe.
- 1.5 lbs chicken breast, sliced into thin cutlets Why this? Thin cuts cook fast and stay tender
- 1 tsp salt Why this? Essential for drawing out flavor
- 1/2 tsp black pepper Why this? Adds a subtle, earthy heat
- 1 tsp paprika Why this? Gives that mahogany color
- 2 tbsp olive oil Why this? High smoke point for searing
- 4 tbsp unsalted butter Why this? Creates the velvety sauce
- 4 cloves garlic, minced Why this? The heart of the flavor profile
- 1 tbsp fresh lemon juice Why this? Brightens the heavy fats
- 1 tbsp fresh parsley, chopped Why this? Freshness and color contrast
| Original Ingredient | Substitute | Why It Works |
|---|---|---|
| Chicken Breast | Chicken Thighs | Higher fat, more forgiving. Note: Needs 2-3 more mins per side |
| Unsalted Butter | Ghee | Higher smoke point. Note: Lacks the slight milky sweetness |
| Fresh Parsley | Dried Oregano | Herbal notes. Note: Add during the garlic step, not at the end |
| Lemon Juice | Apple Cider Vinegar | Tangy acidity. Note: More pungent, use slightly less |
Necessary Kitchen Gear
You don't need a professional kitchen for this. A simple 12 inch skillet (stainless steel or cast iron is best) will do the trick. If you use non stick, you might lose a bit of that deep crust, but it'll still be tasty.
I also recommend a pair of tongs; trying to flip thin cutlets with a fork is a great way to let all the juices leak out.
Step-by-step Cooking Guide
Right then, let's crack on with the cooking. Trust me on the drying part - it's the difference between a pale piece of meat and a golden masterpiece.
- Pat the chicken cutlets completely dry with paper towels. Season both sides evenly with salt, pepper, and paprika. Note: Dry meat sears better
- Heat olive oil over medium high heat in a 12 inch skillet until it shimmers.
- Add chicken in a single layer. Sear for 3-5 minutes per side without moving them until a mahogany colored crust forms, then remove chicken to a plate.
- Reduce heat to medium. Add butter to the same pan and swirl as it melts.
- Stir in the minced garlic and cook for 60 seconds until it smells fragrant and golden.
- Stir in lemon juice, return the chicken to the pan, and spoon the bubbling garlic butter over the meat for 1-2 minutes until internal temperature reaches 160°F (71°C).
- Garnish with chopped fresh parsley.
- Let the meat rest for 3 minutes before serving. Note: This lets the juices redistribute
Avoiding Common Blunders
The most common mistake I see is people crowding the pan. If you put too much chicken in at once, the temperature drops, the meat releases water, and you end up steaming your chicken instead of searing it. It'll be grey and rubbery instead of gold. Work in batches if you have to.
Why Your Chicken Is Rubbery
Overcooking is the main culprit. Chicken breast is lean and loses moisture fast. According to USDA food safety guidelines, the target is 165°F, but since we are resting the meat, pulling it at 160°F is the secret to staying juicy.
Why Your Garlic Is Bitter
Garlic burns in a heartbeat. If your pan is screaming hot when you add the butter and garlic, the garlic will turn black and bitter in seconds. Always drop your heat to medium before adding the butter.
| Problem | Root Cause | Solution |
|---|---|---|
| Sauce is too thin | Not enough butter reduction | Spoon butter over chicken longer |
| Garlic tastes burnt | Heat was too high | Lower heat before adding aromatics |
| Chicken is pale | Pan wasn't hot enough | Wait for oil to shimmer before adding meat |
Common Mistakes Checklist
- ✓ Did you pat the chicken completely dry?
- ✓ Did you avoid moving the chicken during the first 3 minutes?
- ✓ Is the garlic golden, not dark brown?
- ✓ Did you pull the meat at 160°F?
- ✓ Did you let it rest before slicing?
Customizing Your Meal
This easy onepan garlic butter chicken is a great base. If you're feeling fancy, you can easily tweak it to fit your diet or cravings.
For the Low Carb Crowd
This recipe is naturally keto friendly. Just skip the parsley if you're being strict, though it's negligible. To make it a full meal, serve it with steamed asparagus or sautéed spinach in the same pan.
Making Garlic Butter Bites
Instead of thin cutlets, dice the chicken into 1 inch cubes. The cook time drops to about 3 minutes per side, and you get more surface area for that garlic butter to cling to. It's brilliant for kids or as an appetizer.
Adding Hearty Veggies
If you want to turn this into a one pot wonder, toss in some baby potatoes or carrots at the start. If you're using potatoes, I'd recommend checking out my Best Crispy Ovenroasted Potatoes for a separate side, or just sauté them in the pan for 10 minutes before adding the chicken.
Scaling Your Portions
When you're cooking for more than four people, don't just double everything in one pan. You'll end up with a crowded pan and soggy chicken.
- Scaling Down (½ batch): Use an 8 inch skillet. Reduce the cooking time by about 20% as smaller amounts of meat heat up faster.
- Scaling Up (2x batch): Work in two batches for the searing process. For the sauce, you can double the butter and garlic, but only increase the lemon juice to 1.5x to avoid the sauce becoming too acidic.
| Goal | Adjustment | Result |
|---|---|---|
| More Flavor | Extra garlic clove | Punchier, sharper taste |
| Creamier Sauce | Add 1 tbsp heavy cream | Velvety, restaurant style glaze |
| Spicier Kick | Add 1/4 tsp cayenne | Warm, tingling heat |
Fact Checking Kitchen Myths
I've heard a lot of "old wives' tales" in the kitchen. Let's set some straight.
Myth: Searing "seals in" the juices. This is simply not true. Searing creates a crust for flavor and texture, but moisture is lost through the entire surface of the meat regardless of the sear. The juiciness comes from not overcooking it.
Myth: You must use organic butter for the sauce to emulsify. Nope. Any unsalted butter works. The emulsion happens because of the fat and the slight amount of water in the lemon juice and chicken juices, not the brand of butter.
Storage and Waste Tips
If you have leftovers, store them in an airtight container in the fridge for 3-4 days. When reheating, do it gently on the stovetop with a tiny splash of water or a knob of butter to stop the chicken from drying out. I don't recommend freezing this dish, as the butter sauce can separate and become grainy.
To keep things zero waste, don't throw away the chicken trimmings from when you sliced the breasts into cutlets. Toss those scraps into a freezer bag with some onion ends and carrot peels. Once the bag is full, simmer them all together to make a simple, homemade stock for your next soup.
Best Serving Pairs
Since this is a rich, buttery dish, you need sides that can either soak up the sauce or cut through the fat. I love serving this with a side of Classic Potato Salad for a hearty, comforting meal.
If you want something lighter, a simple arugula salad with a lemon vinaigrette is the way to go. The peppery greens balance the richness of the butter. Or, for a total comfort feast, serve it over a bed of fluffy jasmine rice or mashed cauliflower for a low carb twist.
This easy onepan garlic butter chicken is versatile enough to work with almost anything in your fridge.
High in Sodium
840 mg 840 mg of sodium per serving (37% 37% of daily value)
The American Heart Association recommends a limit of 2,300mg of sodium per day to help manage blood pressure and heart health.
Tips to Reduce Sodium
-
Eliminate Added Salt-25%
Remove the 1 tsp of salt entirely or replace it with a salt free seasoning blend to significantly lower the sodium content.
-
Enhance Citric Acid-5%
Increase the fresh lemon juice or add lemon zest; acidity mimics the taste of salt and tricks the palate into needing less sodium.
-
Increase Aromatics-5%
Double the amount of minced garlic to add more pungent, savory depth that reduces the reliance on salt for flavor.
-
Boost Fresh Herbs
Increase the fresh parsley or add other fresh herbs like oregano or thyme to add aromatic complexity to the dish.
Recipe FAQs
Why pat the chicken dry?
It ensures a better sear. Moisture on the surface creates steam, which prevents the meat from developing that mahogany colored crust.
How to tell when the chicken is fully cooked?
Use a meat thermometer to reach 160°F (71°C). This is the safest internal temperature that ensures the chicken is cooked through without becoming tough.
Can I use chicken thighs instead of breasts?
Yes, thighs work well. They are naturally more juicy and forgiving. If you love simple, one-pot style meals, you'll enjoy our Cherry Dump Cake.
How to reheat leftovers without drying them out?
Reheat gently on the stovetop. Add a tiny splash of water or a knob of butter to the pan to keep the meat moist.
Is it true I should move the chicken frequently to prevent sticking?
No, this is a common misconception. Leaving the meat undisturbed for 3 5 minutes per side is what allows the mahogany crust to form.
How to prevent the garlic from burning in the pan?
Reduce heat to medium before adding butter and garlic. Cook the minced garlic for only 60 seconds until fragrant before stirring in the lemon juice.
Can I freeze this garlic butter chicken?
No, it is not recommended. The butter sauce tends to separate and become grainy during the freezing and thawing process.
Easy Garlic Butter Chicken