Coconut Magic Bars: Chewy and Rich
- Time:15 minutes prep + 30 minutes cook + 2 hours chilling = 165 minutes total
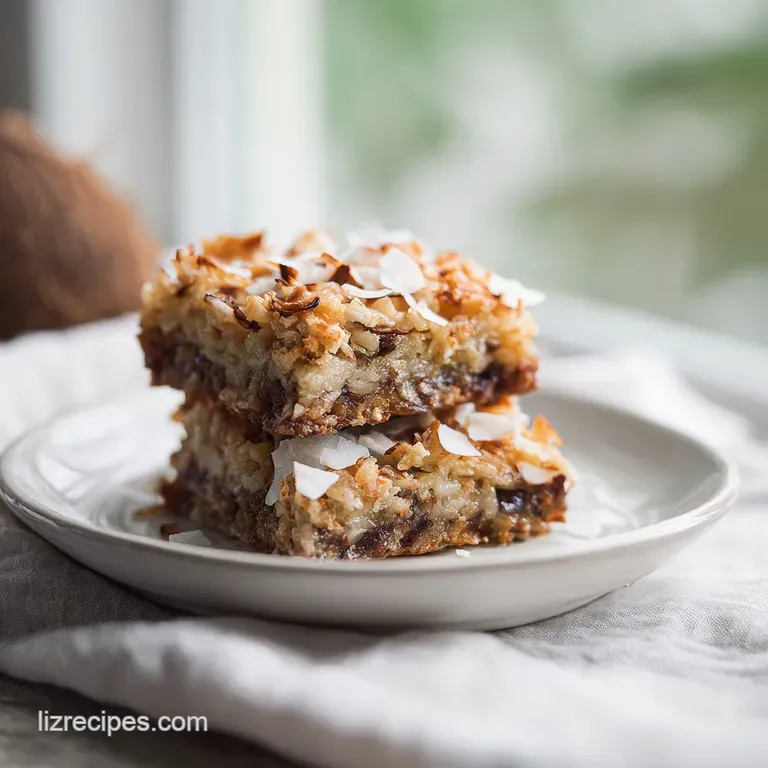
- Flavor/Texture Hook: A buttery, salty graham base topped with fudgy chocolate and crispy toasted coconut.
- Perfect for: School bake sales, budget-friendly family gatherings, or holiday dessert platters.
- Why We Keep Making These Classic Coconut Magic Bars
- The Irresistible Texture of These Chewy Dessert Bars
- Essential Details for Your Next Batch of Magic Bars
- Choosing the Best Components for Your Coconut Magic Bars
- Simple Tools Required for Easy Baking Success
- How to Assemble Your Perfect Coconut Magic Bars Layers
- Avoiding Mistakes for the Most Consistent Dessert Results
- Creative Ways to Personalize Your Coconut Magic Bars
- Keeping Your Coconut Magic Bars Fresh for Days
- Best Ways to Present Your Sweet Coconut Magic Bars
- Recipe FAQs
- 📝 Recipe Card
Why We Keep Making These Classic Coconut Magic Bars
Whenever I see a can of sweetened condensed milk sitting in my pantry, my mind immediately goes to these bars. There is something almost hypnotic about watching that thick, creamy liquid pour over a bed of chocolate chips and pecans.
It is the real hero of this dish, acting as both the glue and the flavoring agent that turns simple pantry ingredients into something that feels special. I remember the first time I made these, I thought for sure I had to stir everything together.
I was so tempted to grab a spoon and mix the layers, but my grandmother stopped me just in time. She told me the "magic" only happens if you let the ingredients sit exactly where they are.
The smell that fills your kitchen while these are in the oven is unlike anything else. It starts with the nutty aroma of the pecans toasting, followed by the deep, caramel like scent of the condensed milk bubbling around the edges.
As the coconut on top begins to turn golden brown, you get that tropical, toasted sweetness that makes it hard to wait for them to cool. Trust me, the waiting is the hardest part of the whole process.
If you try to cut into them while they are still warm, you will end up with a delicious but very messy pile of chocolate and crumbs.
This recipe is also incredibly friendly to your wallet. You don't need fancy extracts or expensive specialty flours to get a high end result. By using standard semi sweet chips and basic graham crackers, you can feed a whole crowd for just a few dollars.
It is an effortless way to bring people together, and since it makes 24 bars, there is always enough to share. Let's get into why this specific method works so well every single time.
The Irresistible Texture of These Chewy Dessert Bars
The beauty of this recipe lies in how the layers interact without actually blending into a single mushy mass. Each component has a specific job to do, and understanding that helps you avoid common pitfalls like a soggy bottom or a middle that won't set.
- Structural Integrity: The par baking step for the graham cracker crust creates a firm foundation that won't crumble under the weight of the toppings.
- Caramelization Process: As the sweetened condensed milk heats up, the sugars cook down and bond with the fats, creating a fudgy, caramel like binder.
- Moisture Barrier: The layer of chocolate and butterscotch chips acts as a shield, preventing the milk from soaking too deeply into the crust and making it soft.
- Surface Tension: The shredded coconut on top protects the pecans from burning while providing a crispy, toasted finish that contrasts with the chewy center.
| Prep Method | Texture Result | Best For | Storage Life |
|---|---|---|---|
| Freshly Crushed | Extra Crunchy | Weekend Treats | 4 Days |
| Pre made Crumbs | Uniform/Soft | Quick Weeknight | 5 Days |
| Hand Chopped Nuts | Chunky/Rustic | Holiday Gifting | 3 Days |
The difference between a "good" bar and a "great" bar often comes down to the quality of your base. If you take an extra two minutes to crush your own graham crackers instead of buying the boxed crumbs, you get a much more varied and interesting texture.
The tiny shards of cracker hold up better against the melted butter, providing a satisfying snap when you bite through the layers.
Essential Details for Your Next Batch of Magic Bars
Before we pull out the mixing bowl, it is helpful to look at how the main ingredients behave. This isn't just about following a list; it is about knowing why we use what we use. If you are looking for more baking inspiration after this, you might also like my raspberry shortbread cookies which use a similar buttery base.
| Component | Scientific Role | Pro Secret |
|---|---|---|
| Sweetened Condensed Milk | Binder and Humectant | Pour it in a slow zig zag pattern for even distribution. |
| Melted Butter (Unsalted) | Fat for the Crust | Use slightly browned butter for a deeper, toffee like flavor. |
| Shredded Coconut | Texture and Protection | Keep an eye on it in the last 5 minutes to prevent over browning. |
| Sea Salt | Flavor Enhancer | A tiny pinch in the crust balances the heavy sugar content. |
Many people ask if they can use evaporated milk instead of condensed milk. The short answer is no. Evaporated milk is much thinner and lacks the sugar content required to create that thick, jammy bond that holds the Coconut Magic Bars together.
If you make that swap, your bars will be soupy and won't ever set, even after a night in the fridge.
Choosing the Best Components for Your Coconut Magic Bars
When you are shopping for these ingredients, sticking to the basics is usually the best move. This is a budget friendly recipe, so don't feel pressured to buy the most expensive chocolate or imported nuts.
- 1.5 cups (approx. 180g) graham cracker crumbs: These provide the essential honey wheat flavor.
- Substitute: Digestives or vanilla wafers. Why this? They provide a similar dry, sandy texture for the base.
- 0.5 cup (113g) unsalted butter, melted: This binds the crumbs together into a solid crust.
- Substitute: Salted butter (just skip the extra pinch of salt). Why this? Fat is necessary to keep the crust from being too brittle.
- 1 pinch sea salt: This cuts through the sweetness of the chips and coconut.
- Substitute: Table salt. Why this? Even a tiny amount of salt makes the chocolate flavor pop.
- 1 cup (170g) semi sweet chocolate chips: These provide the deep cocoa notes.
- Substitute: Dark chocolate chunks. Why this? Semi sweet stays firm at room temperature but melts beautifully in the oven.
- 1 cup (170g) butterscotch chips: These add a creamy, salty sweet butterscotch flavor.
- Substitute: Peanut butter chips. Why this? Butterscotch provides the classic "seven layer" flavor profile.
- 1 cup (110g) chopped pecans: These offer a fatty, crunchy contrast.
- Substitute: Chopped walnuts or almonds. Why this? Pecans have a high oil content that toasts perfectly during the 30 minute bake.
- 14 oz (397g) sweetened condensed milk: The essential glue for the entire recipe.
- Substitute: There is no true substitute for this specific texture. Why this? It caramelizes into a fudge like consistency that holds every layer in place.
- 1.5 cups (130g) sweetened shredded coconut: This creates the signature toasted topping.
- Substitute: Unsweetened coconut flakes. Why this? Shredded coconut covers more surface area than larger flakes.
Simple Tools Required for Easy Baking Success

You really don't need a lot of gear to make this happen. I usually make these when I don't feel like washing a dozen different bowls or using my stand mixer. A simple 9x13-inch (23x33 cm) baking pan is the most important tool here. I highly recommend using a metal pan over glass if you have it.
Metal conducts heat more evenly, which helps the bottom crust get that perfect golden finish without overcooking the edges of the bars.
You will also need some parchment paper. This is non negotiable in my kitchen. Because of the sugar in the condensed milk, these bars can be incredibly sticky. If you don't line your pan, you might find yourself chiseling the bars out of the corners, which isn't fun for anyone.
Leaving a bit of overhang on the sides what I call "parchment handles" allows you to lift the entire block out of the pan once it has chilled for 2 hours. This makes slicing into 24 even squares so much easier.
How to Assemble Your Perfect Coconut Magic Bars Layers
- Preheat your oven to 350°F (175°C). Line your 9x13-inch baking pan with parchment paper, making sure it covers the bottom and goes up the sides.
- Mix the graham cracker crumbs, melted butter, and sea salt in a medium bowl until it looks like wet sand.
- Press this mixture into the bottom of the pan as firmly as you can. Note: Use the bottom of a flat measuring cup to get a perfectly even and packed surface.
- Bake the crust for 8 minutes. Note: This par bake ensures the crust stays crispy and structural under the heavy toppings.
- Take the pan out and sprinkle the semi sweet chocolate chips and butterscotch chips evenly over the hot crust.
- Scatter the chopped pecans over the chips until the surface is mostly covered.
- Open your 14 oz can of sweetened condensed milk and pour it slowly over the layers, making sure to reach the edges.
- Sprinkle the shredded coconut over everything as your final layer.
- Bake for 22 to 25 minutes until the coconut is deeply golden brown and the edges are bubbling.
- Let the pan cool on the counter until it reaches room temperature, then put it in the fridge for at least 2 hours. Note: This is the most critical step for getting clean, sharp slices.
Avoiding Mistakes for the Most Consistent Dessert Results
The biggest mistake I ever made with these was trying to serve them too soon. I had a party to go to and thought an hour of cooling would be enough. I ended up serving what looked like a chocolate coconut soup.
It tasted great, but it wasn't a "bar." The condensed milk needs that full 2 hours of chilling time to transition from a liquid to a solid.
Why Your Crust Is Crumbly
If your base falls apart as soon as you touch it, it usually means the crumbs weren't pressed down hard enough or the butter ratio was off. You want that graham layer to be a solid sheet.
If you find it's still too loose, try adding another tablespoon of melted butter next time, but usually, just pressing harder with a flat object does the trick.
Why the Center is Still Soft
If the edges are burnt but the middle is still liquid, your oven might be running hot, or you poured too much milk in one spot. Always make sure your oven is truly at 350°F (175°C) before putting the pan in.
If the coconut is getting too dark but the middle needs more time, you can loosely tent a piece of foil over the top for the last 5 minutes of baking.
| Problem | Root Cause | Solution |
|---|---|---|
| Burnt Coconut | Pan placed too high in the oven | Bake on the middle rack and tent with foil if needed. |
| Soggy Bottom | Skipping the par bake step | Always bake the crust for 8 minutes before adding toppings. |
| Hard to Slice | Cutting while still warm | Chill for at least 2 hours until the fats and sugars solidify. |
Common Mistakes Checklist
- ✓ Don't forget to line the pan with parchment paper to prevent sticking.
- ✓ Use unsalted butter so you can control the salt level yourself.
- ✓ Avoid using "fat free" condensed milk; it won't set the same way.
- ✓ Make sure the pecans are chopped into small pieces for better distribution.
- ✓ Keep the coconut layer even so it toasts at the same rate across the pan.
Creative Ways to Personalize Your Coconut Magic Bars
While the classic version is hard to beat, there are plenty of ways to swap things out based on what you have in your cupboards. If you find yourself out of butterscotch chips, don't worry. You can easily use white chocolate chips or even more semi sweet chips. The flavor will change slightly, but the "magic" of the layering remains the same. If you are looking for another reliable treat to add to your rotation, check out my Best Chewy Chocolate Chip Cookies.
For a more tropical vibe, some people like to add a layer of dried pineapple or even a splash of rum extract to the condensed milk before pouring. Just be careful not to add too much liquid, or you will disturb the setting process.
If you want to make these nut free for a school event, simply swap the pecans for sunflower seeds or just leave them out and add an extra half cup of graham cracker crumbs to the topping for crunch.
| Servings | Pan Size | Ingredient Adjustment | Cook Time |
|---|---|---|---|
| 12 Bars | 8x8 inch | Halve all ingredients | 20-22 mins |
| 24 Bars | 9x13 inch | Follow recipe exactly | 30 mins total |
| 48 Bars | Two 9x13 | Double all ingredients | Work in batches |
Keeping Your Coconut Magic Bars Fresh for Days
One of the reasons I love this recipe is how well it holds up. You can make these on a Sunday and they will still be fantastic by Thursday. Because of the high sugar and fat content, they don't dry out as quickly as a standard cake or cookie would.
I actually think they taste better on the second day once the flavors have had more time to meld together.
Store your 24 bars in an airtight container in the refrigerator. They will stay fresh for up to 5 days. If you prefer a softer texture, you can let a bar sit at room temperature for 10 minutes before eating, but most people in my house prefer them cold right out of the fridge.
For long term storage, you can freeze these bars. Wrap individual squares in plastic wrap and then place them in a freezer bag. They will keep for up to 3 months. When you're ready to eat one, just let it thaw in the fridge overnight.
To avoid waste, save any leftover graham cracker crumbs! They are brilliant sprinkled over yogurt or used as a topping for vanilla ice cream. If you have a small amount of condensed milk left in the can, stir it into your morning coffee for a decadent treat.
Best Ways to Present Your Sweet Coconut Magic Bars
When it comes to serving, these bars are rich enough that a small square goes a long way. I usually cut them into 24 pieces, but if I am serving them at a large party, I sometimes cut them into even smaller "two bite" triangles.
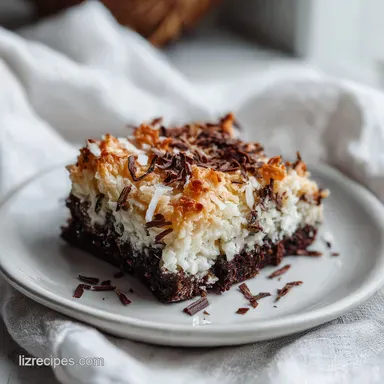
They look beautiful stacked on a white ceramic platter where the dark chocolate and golden coconut can really stand out.
If you want to go the extra mile, you can drizzle a little extra melted chocolate over the top once they have cooled. This adds a "professional" look without much extra effort. They also pair perfectly with a cold glass of milk or a strong cup of black coffee.
The bitterness of the coffee helps balance out the intense sweetness of the butterscotch and coconut. No matter how you serve them, they are always the first thing to disappear from the dessert table. Trust me, once you make these once, they will become a permanent part of your baking rotation.
Right then, it's time to preheat that oven and get started!

Recipe FAQs
Do you use sweetened or unsweetened coconut in Magic Bars?
Use sweetened shredded coconut. The sugar content in sweetened coconut is essential for achieving the classic chewy texture and golden toasted finish required for this recipe.
What are Magic Bars made of?
They consist of seven layers. The base is a mix of graham cracker crumbs, melted unsalted butter, and sea salt, topped with semi sweet chocolate chips, butterscotch chips, chopped pecans, sweetened condensed milk, and shredded coconut.
Are coconut bars good for you?
No, these are a decadent dessert. Each of the 24 squares contains 245 calories, making them a rich treat meant for occasional enjoyment rather than a healthy snack.
What are the two ingredient bars I make every Christmas?
This recipe is not a two-ingredient bar. Magic Bars require seven distinct ingredients to create their signature crust, chip, and nut layers.
Is it true I can skip the refrigerator cooling step?
No, this is a common misconception. You must refrigerate the bars for at least 2 hours after cooling to room temperature to ensure the condensed milk layer sets properly for clean slicing.
How to ensure the crust does not crumble when serving?
Press the crumb mixture firmly and evenly into the pan. Compressing the graham cracker, melted butter, and sea salt mixture creates a sturdy foundation that prevents the bars from falling apart.
How to tell when the bars are finished baking?
Look for bubbling edges and deeply golden brown coconut. These visual cues indicate the condensed milk has caramelized and the top layer is perfectly toasted after the required 22 to 25 minutes in the 350°F oven.
Classic Coconut Magic Bars
Ingredients:
Instructions:
Nutrition Facts:
| Calories | 245 kcal |
|---|---|
| Protein | 2.6g |
| Fat | 15.3g |
| Carbs | 26.5g |
| Fiber | 1.4g |
| Sugar | 21.2g |
| Sodium | 75mg |
