Christmas Gooey Butter Cookies: Soft and Chewy
- Time:15 minutes active + 2 hours 10 mins chilling/setting = 145 minutes total
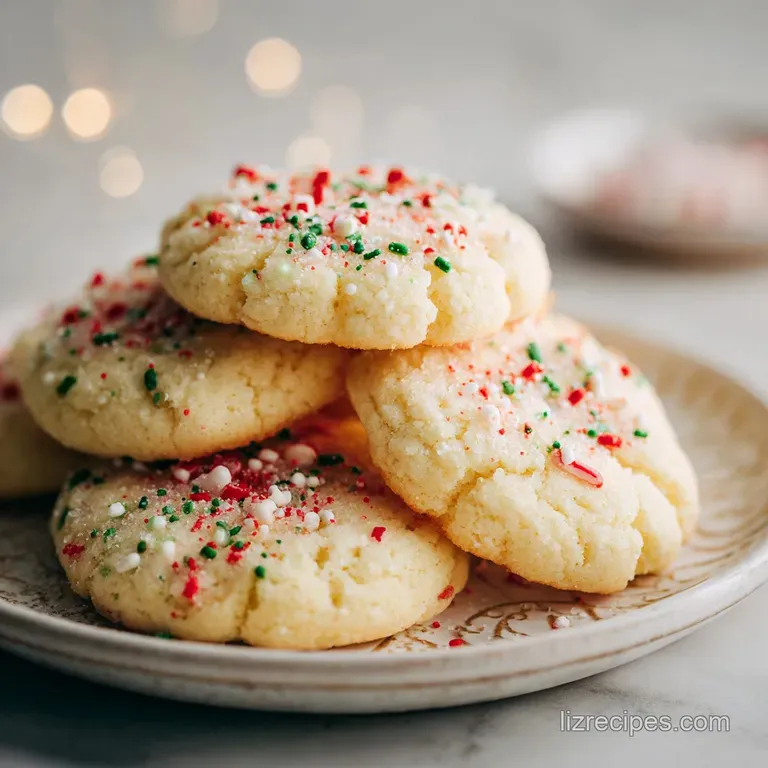
- Flavor/Texture Hook: Velvety cream cheese center with a crackled sugar shatter
- Perfect for: Holiday cookie swaps, last minute gifting, or beginner bakers
- Bake the Best Christmas Gooey Butter Cookies
- The Logic of Lasting Softness
- Essential Ingredients for Success
- Tools You Will Actually Use
- Easy Steps for Cookie Success
- Fixing Common Baking Mistakes
- Variations for Dietary Needs
- Keeping Your Cookies Fresh
- Best Ways to Share
- Real Kitchen Myths
- Recipe FAQs
- 📝 Recipe Card
Bake the Best Christmas Gooey Butter Cookies
The first time I pulled these out of the oven, the smell alone brought my neighbors to the door. Imagine a kitchen filled with the aroma of warm vanilla and toasted butter, while the air is slightly hazy from a dusting of powdered sugar.
I brought a warm tray of these to a neighborhood party, and honestly, they disappeared before I could even take my coat off. One friend actually asked if I had ordered them from an expensive bakery because of that beautiful, crackled "snowy" exterior.
We have all been there during the holidays stressed out, flour on our eyebrows, and a list of "must bake" treats that feels a mile long. That is why I love this recipe. It relies on a few simple staples but delivers a texture that is far from basic.
It’s thick, dense, and has a bite that is remarkably similar to a high end cheesecake, but in a portable, bite sized form.
The real magic happens when that double sugar coating hits the heat. While the center stays soft and fudgy, the outside forms a delicate crust that literally shatters when you bite into it.
It’s a total crowd pleaser that doesn’t require you to spend five hours tempering chocolate or chilling dough overnight. If you need something that looks impressive but feels effortless for a busy Tuesday night, this is your new best friend.
The Logic of Lasting Softness
Fat Emulsification: Combining cream cheese with butter creates a stable fat structure that resists melting too quickly in the oven, ensuring the centers stay dense rather than spreading into thin puddles.
Starch Gelatinization: The flour and cornstarch already present in the cake mix provide a reliable network that traps moisture, which is why these cookies stay soft for days longer than standard sugar cookies.
The Dual Barrier: Coating the dough in granulated sugar first creates a physical shield; this prevents the moisture in the dough from dissolving the powdered sugar, keeping that bright white crinkle effect intact.
Almond Synergy: A tiny amount of almond extract doesn't make the cookies taste like nuts; instead, it acts as a flavor booster that makes the vanilla and butter notes taste much more "expensive" and complex.
| Servings | Ingredient Adjustments | Pan Size | Cook Time |
|---|---|---|---|
| 12 people | 115g butter, 1 egg | 1 Large Sheet | 10 minutes |
| 24 people | 115g butter, 1 egg | 2 Large Sheets | 10 minutes |
| 48 people | 230g butter, 2 eggs | 4 Large Sheets | 12 minutes |
When you are planning your holiday baking marathon, keep in mind that these cookies are quite rich. Most people will only eat one or two in a single sitting, especially if there is hot cocoa involved.
This makes them one of the most efficient recipes for large groups because a single batch of 24 goes much further than you might expect.
| Component | Science Role | Pro Secret |
|---|---|---|
| Cream Cheese | Texture Binder | Use full fat blocks only; tub spreads contain too much water and will cause flat cookies. |
| Large Egg | Protein Structure | Ensure it is room temperature to prevent the butter from seizing during the mixing process. |
| Cake Mix | Leavening Base | The pre sifted flour and balanced leaveners provide the "lift" without needing extra baking soda. |
| Granulated Sugar | Moisture Guard | This first layer of sugar absorbs surface moisture so the powdered sugar stays white and dry. |
Essential Ingredients for Success
To get that specific bakery style finish, we need to be picky about what goes into the bowl. I always use a high-quality pure vanilla extract because with so few ingredients, you can really taste the difference.
For the cake mix, a standard white or yellow mix works perfectly, but make sure it is the 432g (15.25 oz) size to keep your ratios correct.
- 226g (8 oz) cream cheese: Softened to room temperature. Why this? Provides the "gooey" cheesecake like foundation.
- 115g (0.5 cup) unsalted butter: Softened, not melted. Why this? Adds richness and helps the edges crisp up.
- 1 large egg: Room temperature is best. Why this? Binds the fats and dry ingredients smoothly.
- 5ml (1 tsp) pure vanilla extract: For that classic home baked aroma.
- 2.5ml (0.5 tsp) almond extract: The secret ingredient for professional flavor.
- 432g (1 box) white or yellow cake mix: The structural base.
- 100g (0.5 cup) granulated sugar: For the first coating.
- 120g (1 cup) confectioners' sugar: For the snowy finish.
- 45g (3 tbsp) Christmas nonpareils: For that festive pop of color.
Tools You Will Actually Use
You don't need a professional kitchen for this, but a few specific tools make the process much less messy. I highly recommend using a stand mixer or a sturdy hand mixer. The dough for these cookies is famously sticky think of it like thick cake batter so trying to mix it by hand with a wooden spoon will give you a serious workout that you probably don't want.
A 1.5 tablespoon cookie scoop is also a non negotiable for me. Since the dough is so tacky, using your bare hands to form the balls before they hit the sugar will result in more dough on your fingers than on the baking sheet. If you want a different texture profile for your holiday spread, you might also enjoy my classic chewy cookies which use a more traditional flour base.
Easy Steps for Cookie Success

- Cream the fats. Place the 226g of softened cream cheese and 115g of butter in your mixer bowl. Beat on medium high for 3 minutes until the mixture is pale and looks like whipped frosting. Note: This aeration is what keeps the cookies from being too heavy.
- Add the flavorings. Toss in the egg, vanilla, and almond extract. Beat again until just combined, making sure to scrape the bottom of the bowl with a spatula.
- Incorporate the base. Set your mixer to the lowest speed. Gradually pour in the 432g of dry cake mix until no white streaks remain. Note: Over mixing here can make the cookies tough, so stop as soon as it's uniform.
- Chill the dough. Cover the bowl tightly with plastic wrap. Place it in the fridge for 2 hours. Don't skip this, or the dough will be too soft to handle and the cookies will spread too thin.
- Prep the oven. When the chilling time is almost up, preheat your oven to 175°C (350°F). Line your baking sheets with parchment paper or silicone mats.
- Set up the sugar station. Place the granulated sugar in one small bowl and the confectioners' sugar in another. This assembly line keeps things moving quickly.
- Scoop and roll. Use your 1.5 tablespoon scoop to drop a ball of dough into the granulated sugar. Roll it to coat, then move it to the powdered sugar and roll it until it is heavily draped in white.
- Decorate. Place the balls about 5cm apart on the baking sheets. Press a few Christmas nonpareils into the top of each ball until they are firmly embedded.
- The final bake. Slide the pans into the oven for 10 minutes. Watch for the edges to set while the centers still look slightly soft. They should look crackled and "puffy."
- Cool down. Let the cookies sit on the hot pan for at least 5 minutes before moving them. This carryover heat finishes cooking the very center without drying out the edges.
Fixing Common Baking Mistakes
One of the biggest hurdles with "gooey" cookies is the temptation to overbake them. Because they are so pale, it’s easy to think they aren't done. If you wait until they look browned, you have waited too long! They should be matt on top and just barely firm to a light touch on the sides.
Mastering the Emulsion
If your butter and cream cheese are at different temperatures, the mixture will look curdled. This happens because the fats aren't bonding correctly. If this happens, just keep beating the mixture for another minute or two; the friction will usually warm it up enough to smooth it out.
Managing Gummy Centers
If the center of your cookie feels more like raw dough than a soft fudge, it’s usually a temperature issue. Make sure your oven is truly at 175°C by using an oven thermometer. If the oven is too cool, the outside won't set before the inside gets too warm, resulting in a gummy texture.
| Problem | Root Cause | Solution |
|---|---|---|
| Cookies are flat | Dough was too warm | Chill the dough for the full 2 hours or freeze balls for 15 mins before baking. |
| Sugar melted away | Skipped granulated sugar | Always roll in granulated sugar first to create a moisture barrier. |
| Cookies are greasy | low-fat cream cheese | Only use full fat block cream cheese for the correct fat to moisture ratio. |
Common Mistakes Checklist
- ✓ Pat the cream cheese dry if there is any liquid in the packaging (prevents excess moisture).
- ✓ Use room temperature eggs to ensure a silky, consistent dough.
- ✓ Use a kitchen scale for the cake mix if you are using a partial box.
- ✓ Do not over crowd the pan; these cookies need room to breathe and crack.
- ✓ Allow the baking sheets to cool completely between batches so the dough doesn't melt instantly.
Variations for Dietary Needs
While the classic version is hard to beat, I have a few friends with dietary restrictions who always feel left out at Christmas. Luckily, this recipe is quite flexible. For a gluten-free version, simply swap the standard cake mix for a gluten-free yellow cake mix.
Because the structure comes largely from the cream cheese and egg, the gluten-free version turns out surprisingly well, with almost no change in the "gooey" factor.
If you are looking for a dairy-free alternative, you can find plant based cream cheese and butter sticks at most grocery stores now. Just be aware that plant based fats often have a lower melting point, so you might want to chill the dough for an extra hour to keep them from spreading. For another twist on a soft cookie, you could also check out these brown butter chocolate chip cookies which offer a deeper, nuttier flavor profile.
| Original Ingredient | Substitute | Why It Works |
|---|---|---|
| White Cake Mix | Chocolate Cake Mix | Changes the flavor to a "black forest" style. Note: Very rich. |
| Unsalted Butter | Salted Butter | Adds a savory note that cuts through the sugar. Note: Reduce extra salt. |
| Vanilla Extract | Peppermint Extract | Creates a "candy cane" flavor perfect for December. Note: Use only 0.5 tsp. |
Keeping Your Cookies Fresh
These cookies actually taste better on the second day! The moisture from the cream cheese settles, and the flavors of the extracts become more pronounced. You can store them in an airtight container at room temperature for up to 4 days.
If you prefer them to stay "chilled" like a cheesecake, they will last in the fridge for about a week.
For zero waste baking, if you have leftover powdered sugar from the rolling process, don't throw it away! Sift out any little bits of dough, and you can use it to make a quick glaze for muffins or even a small batch of frosting.
If you find yourself with broken cookie pieces at the bottom of the container, they make an incredible topping for vanilla bean ice cream or stirred into a bowl of Greek yogurt.
To freeze these, I recommend freezing them in a single layer on a tray first. Once they are frozen solid, you can toss them into a freezer bag. This prevents the powdered sugar from getting smashed or rubbing off. They will stay fresh in the freezer for up to 3 months.
When you're ready to eat one, just let it thaw on the counter for 15 minutes.
Best Ways to Share
When it comes to serving these, I like to keep it simple. Because they are so bright white and festive with the sprinkles, they look stunning on a dark wood board or a slate platter. They are the perfect partner for a strong cup of black coffee or a glass of cold milk.
If you really want to lean into the holiday spirit, serve them alongside a warm mug of peppermint hot cocoa.
Gift Box Presentation
If you are giving these as gifts, use small parchment lined tins. Since the cookies are soft, avoid stacking them more than two layers high, or they might stick together. A little bit of festive ribbon and a handwritten tag go a long way.
I usually tell people to "enjoy within 3 days" to make sure they get that perfect texture.
Coffee and Cocoa Pairings
Because these are quite sweet, they pair beautifully with bitter or tart flavors. A raspberry coulis on the side of a dessert plate can cut right through the richness. Alternatively, a sprinkle of sea salt on top right after they come out of the oven can add a sophisticated touch that adults will really appreciate during a holiday party.
Real Kitchen Myths
One major myth is that you can substitute tub cream cheese for the block kind. It might seem easier to spread, but tub cream cheese is aerated and has a much higher water content. If you use it, your cookies will spread into one giant, oily sheet on your baking pan. Always stick to the foil wrapped blocks for baking.
Another misconception is that the dough doesn't "really" need to chill for 2 hours. I have tried cutting it down to 30 minutes, and I promise it is a disaster. Warm dough won't hold the powdered sugar properly, and you'll end up with a sticky mess that is impossible to roll.
The chill time is what gives the cookies their structural integrity and that iconic tall, puffy shape.

Recipe FAQs
Is it true that I can skip the 2-hour refrigeration step if I am in a hurry?
No, this is a common misconception. Refrigeration is essential for dough stability and ensures you can handle the sticky batter without it melting into a puddle in the oven.
How to achieve the signature crackled top on these cookies?
Roll the dough balls generously in granulated sugar followed by a heavy coating of confectioners' sugar. The contrast between the sugars creates the iconic crackled appearance as the cookies spread during the 10-12 minute bake time.
Can I use milk instead of the required extracts to flavor the dough?
No, stick to vanilla and almond extract. Milk will alter the moisture balance of the dough and lacks the concentrated aromatic profile needed to balance the richness of the cream cheese and butter.
Is it possible to bake these cookies at a higher temperature to speed up the process?
No, maintain the oven temperature at 350°F (175°C). A higher heat will set the edges too quickly and burn the powdered sugar coating before the centers have the chance to achieve that signature soft, gooey texture.
How to know exactly when these cookies are done baking?
Remove them from the oven the moment the edges appear set. Even if the centers look slightly underbaked, they will continue to firm up as they cool on the tray, preserving the soft interior.
Is it mandatory to use a specific type of cake mix for this recipe?
Yes, use only white or yellow cake mix. These specific varieties provide the correct flour-to-leavening ratio required to support the structure of the cream cheese and butter mixture.
How to prevent the cookie balls from spreading too much on the baking sheet?
Line your baking sheets with parchment paper and ensure your butter and cream cheese are not over softened. If the dough feels overly warm or greasy before you roll the balls, place it back in the refrigerator for an additional 15 minutes to firm up.
Christmas Gooey Butter Cookies

Ingredients:
Instructions:
Nutrition Facts:
| Calories | 178 kcal |
|---|---|
| Protein | 2 g |
| Fat | 9 g |
| Carbs | 24 g |
| Fiber | 0 g |
| Sugar | 16 g |
| Sodium | 154 mg |
