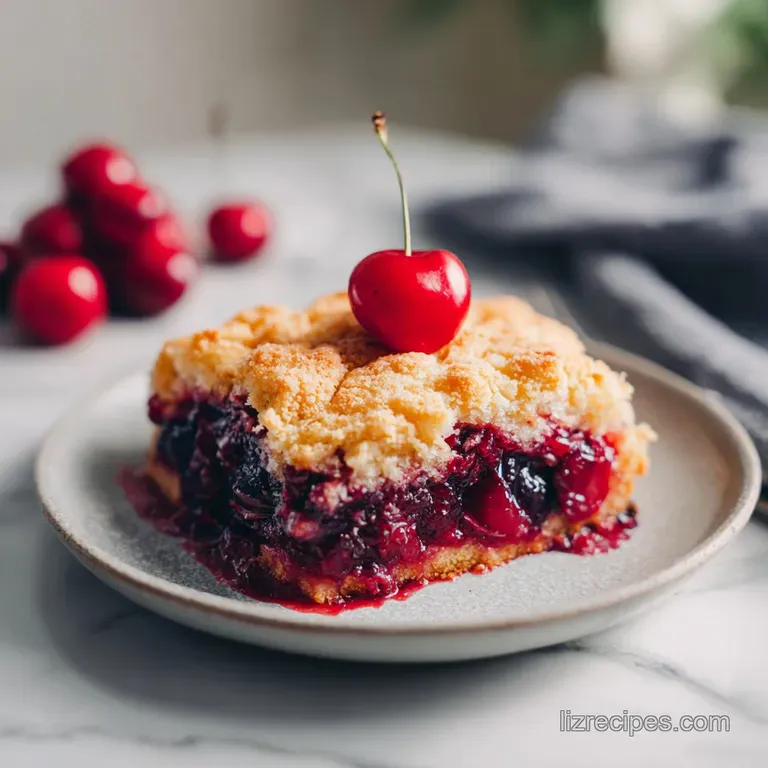
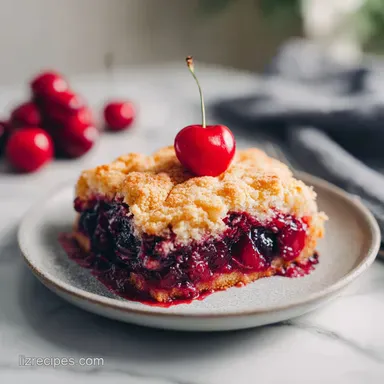
Cherry Dump Cake: Warm and Buttery

- Time:10 minutes prep + 50 minutes cook = 80 minutes total
- Flavor/Texture Hook: Tart, velvety cherries beneath a buttery, shatter crisp topping
- Perfect for: Last minute potlucks, family Sunday dinners, or beginner bakers
- Master the Ultimate Cherry Dump Cake Recipe
- Vital Recipe Specs and Practical Time Guidelines
- Why This Works
- Gathering Simple Ingredients for Your Fruit Base
- Minimal Kitchen Equipment for Success
- Step-by-Step Process for a Craggy Golden Crust
- Fixing Dry Spots and Common Baking Mistakes
- Creative Fruit and Topping Flavor Swaps
- Storing Leftovers to Keep the Topping Crisp
- Serving Ideas to Complement Your Warm Dessert
- Recipe FAQs
- 📝 Recipe Card
Master the Ultimate Cherry Dump Cake Recipe
Imagine walking into a kitchen where the air is thick with the scent of toasted almonds and simmering fruit. That sizzle you hear isn't a steak on the grill; it's the sound of butter melting into sugar, creating a craggy, golden crust that practically begs for a scoop of melting vanilla ice cream.
I first encountered this dish at a chaotic neighborhood block party where the host looked entirely too relaxed for someone feeding forty people. While I was fussing over a complicated tart, she was pulling this bubbling, ruby red masterpiece out of the oven, and honestly, the crowd swarmed her dish first.
The magic of this specific method isn't just about speed; it's about the texture. Most versions of this classic are hit or-miss, often leaving you with pockets of raw flour that taste like disappointment. We’ve all been there, poking at a dry patch of yellow cake mix with a fork, wondering where we went wrong.
But after a few trials and a lot of butter grating, I found that the secret lies in how the fat meets the starch. It’s the difference between a soggy mess and a crust that has a distinct, satisfying shatter when your spoon hits it.
Right then, let's talk about why we’re using these specific tweaks. We aren't just dumping and hoping for the best. By adding a splash of citrus and a hint of almond, we’re cutting through the heavy sweetness of the canned fruit.
It makes the whole thing taste like you spent hours pitting fresh cherries in the middle of July, even if you’re actually pulling cans out of the pantry on a rainy Tuesday in November. Trust me on this, once you try the frozen butter trick, you’ll never go back to the old "slice and pray" method.
Vital Recipe Specs and Practical Time Guidelines
Before we get our hands dirty, we need to look at the roadmap. This is a low stress bake, but timing is everything if you want that filling to be thickened and the topping to be fully set. If you pull it too early, the fruit will be runny; too late, and the almonds will go from toasted to burnt.
We are looking for that sweet spot where the juices are visibly thick and bubbling around the edges of the pan.
Consistency Tip: Use the same 9x13-inch dish every time to ensure the layer of cake mix is thin enough to cook through but thick enough to form a substantial crust. A deeper, smaller dish will result in a doughy center that never quite crisps up.
| Method Feature | Fresh Fruit Prep | Shortcut Dump Method | Why It Matters |
|---|---|---|---|
| Active Labor | 45 minutes (pitting/simmering) | 10 minutes | Saves time without sacrificing the final texture |
| Texture Control | Variable acidity/liquid | Consistent starch to fruit ratio | Ensures the topping doesn't sink into the fruit |
| Flavor Depth | High but labor intensive | Enhanced with extracts/citrus | Gives you "bakery style" results in minutes |
You might be tempted to skip the chilling or the preheating, but the 80 minutes total time accounts for the thermal lag of the heavy glass baking dish. If you're using a metal pan, keep an eye on it around the 40 minute mark, as metal conducts heat much faster than ceramic or glass.
Why This Works
- Fat Distribution: Grating frozen butter creates thousands of tiny "beads" of fat that melt evenly, ensuring no dry flour patches remain.
- Starch Gelatinization: The juices from the cherry filling bubble up into the cake mix, hydrating the flour from the bottom while the butter crisps it from the top.
- Acid Balance: Lemon juice breaks down the cloying sweetness of the corn syrup in the pie filling, making the cherry flavor pop.
- Aromatic Synergy: Almond extract shares chemical compounds with stone fruits like cherries, deepening the fruit's natural flavor profile.
| Component | Science Role | Pro Secret |
|---|---|---|
| Frozen Butter | Steam generation for lift | Grate it directly over the pan to keep it cold |
| Lemon Juice | Pectin activation | Fresh juice is better than bottled for bright acidity |
| Yellow Cake Mix | Structural starch and sugar | Press it lightly into the fruit to jumpstart hydration |
| Cherry Filling | Heat conducting fruit base | Use "no sugar added" to control the final sweetness |
The interaction between the sugar in the mix and the fat in the butter is what gives us that velvety mouthfeel. Without the lemon juice, the sugar can feel heavy on the tongue, but that tiny bit of acid cleanses the palate after every bite.
Gathering Simple Ingredients for Your Fruit Base
When you're shopping for this, don't just grab the first can you see. The quality of your cherry filling dictates the "soul" of the dessert. I always opt for the no sugar added versions because the cake mix already provides plenty of sweetness.
If you can only find the regular kind, just add an extra squeeze of lemon to keep things balanced.
- 42 oz no sugar added cherry pie filling: This provides the bulk and the moisture. Why this? Using two cans ensures a thick, jammy layer that doesn't dry out.
- 0.5 tsp pure almond extract: This is the secret "what is that?" ingredient. Why this? It bridges the gap between the fruit and the nutty topping.
- 1 tsp fresh lemon juice: Provides necessary brightness.
- 15.25 oz yellow cake mix: Your structural foundation. Why this? Yellow mix has a richer, more buttery flavor than white cake mix.
- 0.75 cup unsalted butter, frozen: The crucial fat source for the crust.
- 0.5 cup sliced almonds: Adds the essential crunch.
If you are feeling adventurous, you can actually use one can of cherry and one can of pineapple. This creates a cherry pineapple dump cake vibe that is incredibly popular at summer cookouts. The acidity of the pineapple helps the cherries stay vibrant and prevents the dish from feeling too "one note."
Minimal Kitchen Equipment for Success
The beauty of a dump cake is that you don't need a stand mixer such as KitchenAid or even a large mixing bowl. We are doing almost all the work directly in the baking dish. This means fewer dishes for you to wash and more time to enjoy your coffee while the oven does the heavy lifting.
You will need a 9x13-inch baking dish, preferably glass or ceramic. These materials hold heat more steadily than thin metal, which helps the fruit simmer without scorching the bottom. You’ll also need a box grater.
This is the most important tool in the arsenal for this specific recipe. By grating the frozen butter, you get an even layer that covers every square inch of the cake mix.
Finally, have a rubber spatula and a measuring spoon handy. The spatula is just for smoothing the fruit, and the measuring spoon ensures you don't overdo the almond extract it’s powerful stuff, and too much can make the cake taste like soap. Keep it simple, keep it quick.
step-by-step Process for a Craggy Golden Crust
- Preheat your oven to 350°F (175°C). Spread two 21 ounce cans of cherry pie filling into a 9x13-inch baking dish.
- Directly in the baking dish, stir the almond extract and lemon juice into the cherry filling. Smooth the top with a spatula. Note: Mixing it in the pan saves you a bowl and ensures the flavor is even.
- Sprinkle the dry yellow cake mix evenly over the fruit base. Use the back of a spoon to lightly press the powder into the juices without stirring. Wait until the powder looks slightly damp in spots before moving to the next step.
- Using a box grater, grate the frozen butter evenly over the entire surface of the cake mix, ensuring edge to edge coverage.
- Top the butter layer with sliced almonds or chopped pecans.
- Bake for 45 to 50 minutes on the center rack until the filling is bubbling and the crust is a deep golden brown.
- Check the center at 45 minutes; if the cake mix still looks like dry powder, use a spoon to gently dab a little butter or juice over the spot.
- Remove from the oven and let it sit for at least 15 minutes. Note: The filling needs this time to thicken as it cools, or it will be too runny to serve.
Chef's Tip: If you see a dry patch of flour halfway through baking, don't panic. Take a small spoon and gently "pet" the spot to encourage the melting butter to soak in. Never stir the layers, or you'll lose that distinct crust to fruit separation.
Fixing Dry Spots and Common Baking Mistakes
The most common complaint with any dump cake is the dreaded "flour patch." This happens when the butter doesn't reach certain areas of the cake mix. My frozen butter grating method almost entirely eliminates this, but if your oven has hot spots, you might still see a little stubborn white powder.
Eliminating Dry Powder Patches
If you notice dry spots near the end of the 50 minutes, it's usually because the butter wasn't distributed to the very edges. The fix is simple: use a spoon to pull a tiny bit of the bubbling red juice over the dry spot. It will hydrate instantly and bake into a beautiful purple red crust.
Preventing a Soggy Bottom
If the bottom of your cake is too wet, it might be because the fruit filling had too much liquid or the oven temperature was too low. Always ensure your oven is fully preheated to 350°F. If you're using a glass dish, it takes longer to get up to temp, so don't rush the process.
| Problem | Root Cause | Solution |
|---|---|---|
| Powdery top | Uneven butter distribution | Grate butter while frozen for total coverage |
| Runny filling | Didn't rest after baking | Allow 15-20 mins for starch to set |
| Burnt almonds | Top rack was too high | Bake on center rack; tent with foil if needed |
Common Mistakes Checklist
- ✓ Never stir the cake mix into the fruit; it should stay as a distinct top layer.
- ✓ Ensure the butter is truly frozen (at least 30 mins) before grating.
- ✓ Don't skip the resting time it's essentially a "second cook" for the starch.
- ✓ Use "no sugar added" filling to avoid a cloying, overly sweet result.
- ✓ Check for "edge to edge" coverage with the cake mix so fruit doesn't boil over.
Creative Fruit and Topping Flavor Swaps
One of the best things about this recipe is how easily it adapts to what you have in the pantry. If you aren't a fan of cherries, or you want to lean into a different season, the ratios stay almost exactly the same. You just need to keep the total fruit volume around 42 ounces.
Creating a Pineapple Variation
Using one can of cherry and one can of crushed pineapple (undrained) creates a much more tropical, acidic profile. This is often called a "Lava Cake" in some regions because of how the red cherries bubble through the yellow pineapple.
Adding a Cream Cheese Twist
For an extra velvety experience, you can drop small dollops of softened cream cheese (about 4 oz total) onto the fruit layer before adding the cake mix. It creates little pockets of cheesecake like goodness that pair perfectly with the tart cherries.
| Original Ingredient | Substitute | Why It Works |
|---|---|---|
| Yellow Cake Mix | Chocolate Cake Mix | Creates a Black Forest profile. Note: Richer and sweeter. |
| Sliced Almonds | Chopped Walnuts | Provides a heartier, earthy crunch. |
| Cherry Filling | Blueberry Filling | Similar viscosity but sweeter. Best with lemon zest. |
If you want a different texture entirely, try my Magic Bars recipe for another layered dessert that uses a similar "set it and forget it" philosophy. Both recipes rely on the oven to do the mixing for you!
Storing Leftovers to Keep the Topping Crisp
If you happen to have leftovers which is rare in my house you need to store them correctly to prevent the crust from becoming a sponge. Once the cake has cooled completely to room temperature, cover it tightly with plastic wrap or aluminum foil.
- Fridge
- Keep it for up to 4 days. The topping will soften slightly, but the flavors will actually deepen.
- Freezer
- You can freeze this for up to 3 months. I recommend freezing individual portions in airtight containers.
- Reheating
- To regain some of that "shatter," reheat in a 350°F oven for 10-15 minutes rather than using the microwave.
Zero Waste Tip: If you have leftover cake mix from a smaller project, you can scale this down to an 8x8 pan by using just one can of fruit and half the butter. Any leftover sliced almonds are fantastic toasted and tossed into a salad the next day!
Serving Ideas to Complement Your Warm Dessert
While this cake is a star on its own, it really reaches its full potential when paired with something cool and creamy. The contrast between the hot, bubbling cherries and cold cream is what makes it feel like a professional dessert.
A classic scoop of high-quality vanilla bean ice cream is the gold standard here. As it melts, it creates a sort of "creme anglaise" that mingles with the cherry juices. If you want something a bit lighter, a dollop of unsweetened whipped cream with a pinch of cinnamon is fantastic.
The cinnamon brings out the woody notes in the toasted almonds.
For another easy dessert that feeds a crowd, you might like my Peanut Butter Pie, which offers a completely different, no bake texture to balance out a heavy meal. If you're serving this at a holiday dinner, consider putting out a small pitcher of warm custard it’s very traditional and feels incredibly cozy on a cold night. Regardless of how you serve it, make sure it’s warm. That temperature contrast is what makes the "shatter" of the crust so enjoyable!

Recipe FAQs
What is the biggest mistake to avoid when making a dump cake?
Never stir the cake mix into the fruit. The defining characteristic of a dump cake is the layered structure; stirring turns the crisp, buttery topping into a gummy, cake like batter instead of the intended golden, craggy crust.
What are some tips for making cherry dump cake?
Use frozen butter and a box grater for even distribution. Grating the butter ensures it covers every speck of dry cake mix, which is the secret to achieving a uniform, crunchy topping across the entire 9x13-inch pan.
What is the best cake mix for dump cake?
Stick with a standard yellow cake mix. Its neutral, buttery flavor profile balances the tartness of the cherries and the brightness of the lemon juice perfectly without overpowering the fruit base.
How long does it take to cook a cherry dump cake?
Bake for 45 to 50 minutes. Place the dish on the center rack of your 350°F oven and watch for the cherry filling to bubble vigorously around the edges and the crust to reach a deep, golden brown color.
How to ensure the topping gets crispy?
Press the dry cake mix lightly into the cherry juices using the back of a spoon. This minor contact helps the bottom of the mix hydrate just enough to bond with the fruit while leaving the top layer dry enough to crisp into that signature texture, similar to how we achieve tangy vegetable crispness through precise moisture management.
Is it true I should stir the almond extract into the cake mix?
No, this is a common misconception. You must whisk the almond extract and lemon juice directly into the cherry pie filling before adding the cake mix to ensure the flavor is evenly distributed throughout the fruit base.
How to store leftovers?
Cool the cake completely before covering it tightly with plastic wrap. Keeping it airtight helps preserve the texture for up to four days in the refrigerator, though be aware that the moisture from the fruit will naturally soften the crust over time.
Cherry Dump Cake Recipe
Ingredients:
Instructions:
Nutrition Facts:
| Calories | 340 kcal |
|---|---|
| Protein | 2.1g |
| Fat | 17.6g |
| Carbs | 42.1g |
| Fiber | 1.8g |
| Sugar | 19.4g |
| Sodium | 318mg |
