Introduction: Steak Cooking Chart
Cooking the perfect steak can be an art form, but it’s also a science that anyone can master with the right tools and knowledge. One of the most essential tools in this process is a reliable steak cooking chart. This chart serves as a reference guide to help you determine the exact internal temperature needed for your preferred level of doneness, ensuring that your steak is cooked precisely the way you like it every time.
In this comprehensive guide, we will explore everything you need to know about using a steak cooking chart, including the science behind steak doneness, tips for different cooking methods, and the importance of resting your steak. Whether you prefer your steak rare, medium, or well-done, this guide will equip you with the knowledge to cook the perfect steak at home.
Understanding Steak Doneness Levels
The doneness of steak is all about its internal temperature, which directly influences the texture, flavor, and juiciness of the meat. Here’s a detailed breakdown of the most common doneness levels:
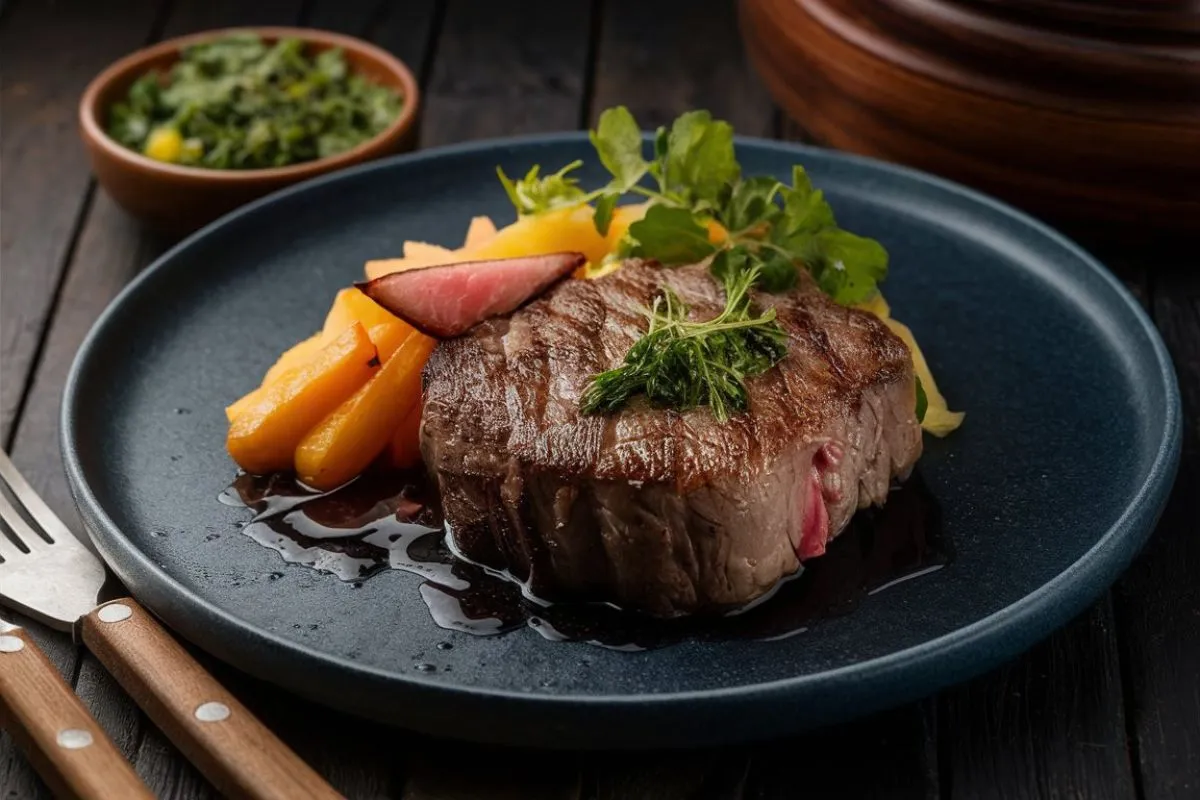
- Rare (120-125°F): A rare steak is cool in the center with a deep red color. The texture is soft and very juicy, with a slight char on the outside.
- Medium Rare (130-135°F): Often considered the ideal doneness by many steak enthusiasts, a medium-rare steak has a warm red center and is slightly firmer than rare. The juices are abundant, and the texture is tender.
- Medium (140-145°F): Medium steaks have a light pink center. They are firm and less juicy than medium-rare but still retain a good amount of tenderness.
- Medium Well (150-155°F): This level of doneness leaves the steak with just a hint of pink in the center. The steak is firmer and significantly less juicy but still flavorful when cooked correctly.
- Well Done (160°F and above): A well-done steak is uniformly brown throughout. It is firm and dry, with no pink in the center. This level of doneness is often avoided by steak purists, but some prefer the fully cooked texture.
Understanding these temperature ranges is crucial because they help you achieve the perfect balance between safety and taste. Overcooking can lead to dry, tough meat, while undercooking might leave your steak too raw for comfort.
The Science Behind Steak Cooking
Cooking steak is as much about understanding the science of heat transfer as it is about following a recipe. When you cook a steak, the heat causes the proteins in the meat to denature and coagulate, which changes the texture and appearance of the meat. Here’s a closer look at the process:
- Maillard Reaction: The Maillard reaction is a chemical reaction between amino acids and reducing sugars that gives browned food its distinctive flavor. This reaction occurs at high temperatures and is responsible for the flavorful crust on your steak.
- Denaturation of Proteins: As the steak cooks, the heat causes the proteins in the muscle fibers to denature, or unfold, and then coagulate, or clump together. This process starts at around 105°F and continues until the steak is removed from the heat.
- Collagen Breakdown: Collagen, a connective tissue in meat, begins to break down into gelatin when the internal temperature of the steak reaches about 160°F. This is why tougher cuts of meat, like brisket, are cooked to higher temperatures to become tender. However, in tender cuts like ribeye or filet mignon, overcooking to this temperature can make the meat dry.
- Juice Redistribution: As the steak cooks, the juices are pushed towards the center of the meat. Allowing the steak to rest after cooking enables these juices to redistribute evenly throughout the steak, making it more tender and flavorful.
By understanding these processes, you can better control the cooking of your steak and achieve the desired texture and flavor.
Using a Steak Cooking Chart
A steak cooking chart is an indispensable tool for any home cook or professional chef. It provides a quick reference to the internal temperatures required for different levels of doneness, helping you cook your steak to perfection. Here’s how to use a steak cooking chart effectively:
- Preheat and Sear: Begin by preheating your grill, pan, or oven to a high temperature (about 450°F to 550°F). Searing the steak on both sides helps to develop a flavorful crust through the Maillard reaction.
- Check the Temperature: Use a meat thermometer to check the internal temperature of the steak. Insert the thermometer into the thickest part of the steak, avoiding bones and fat, to get an accurate reading. Compare this reading to the temperatures listed on the cooking chart to determine the doneness. For example, if you prefer a medium-rare steak, the internal temperature should be between 130-135°F.
- Rest the Steak: After removing the steak from the heat, let it rest for 5-10 minutes. This step is crucial as it allows the juices to redistribute throughout the steak, enhancing its flavor and tenderness.
- Adjust for Carryover Cooking: Keep in mind that the steak’s temperature will rise slightly (about 5°F) after it’s removed from the heat due to carryover cooking. Therefore, it’s advisable to remove the steak from the heat when it’s 5°F below your desired doneness.
A steak cooking chart is especially helpful when cooking multiple steaks at different doneness levels. By monitoring the temperature and adjusting the cooking time accordingly, you can ensure that each steak is cooked perfectly.
Tips for Perfect Steak Cooking
Achieving the perfect steak involves more than just following a chart. Here are some additional tips to ensure your steak turns out delicious every time:
- Choose the Right Cut: Different cuts of steak have varying levels of fat, tenderness, and flavor. For example, a ribeye is marbled with fat, making it juicy and flavorful, while a filet mignon is leaner but extremely tender. Choose a cut that suits your taste and cooking method.
- Season Generously: Season your steak with kosher salt and freshly ground black pepper at least 30 minutes before cooking. This allows the seasoning to penetrate the meat, enhancing its flavor. You can also add herbs like rosemary, thyme, and garlic for additional depth.
- Use High Heat for Searing: Whether you’re grilling or pan-searing, high heat is essential for creating a flavorful crust. Sear the steak for 2-3 minutes on each side, then reduce the heat to cook it to your desired doneness.
- Reverse Sear for Even Cooking: The reverse sear method involves cooking the steak at a low temperature in the oven or on the grill until it’s just below the desired doneness. Then, sear it on high heat for a short time to create a crust. This method is ideal for thicker cuts as it ensures even cooking throughout.
- Resting is Crucial: Never skip the resting period after cooking your steak. This allows the juices, which have been pushed towards the center during cooking, to redistribute throughout the steak, making it more moist and flavorful.
- Finish with Butter: Adding a pat of butter to the steak during the last minute of cooking adds richness and helps create a beautiful, glossy finish. You can also use compound butter flavored with herbs, garlic, or citrus.
Steak Cooking Methods and Their Impact on Doneness
Different cooking methods can influence how your steak reaches the desired doneness. Here’s a look at some popular methods:
- Grilling: Grilling is ideal for high-heat cooking, which creates a good sear on the outside of the steak while leaving the inside juicy. Use direct heat for thin steaks and a combination of direct and indirect heat for thicker cuts.
- Pan-Searing: Pan-searing allows you to achieve a crusty exterior on your steak. For thicker cuts, start by searing in a hot pan and then finish in the oven to ensure even cooking.
- Sous Vide: Sous vide cooking involves vacuum-sealing the steak and cooking it in a water bath at a precise temperature. This method ensures the steak is cooked evenly from edge to edge. Finish with a quick sear in a hot pan or on the grill to add flavor and texture.
- Broiling: Broiling uses intense direct heat from above, similar to grilling but in an oven. It’s best for thinner cuts of steak and can achieve a good sear if done correctly.
Each method has its own benefits, so choose the one that best suits your cut of steak and desired level of doneness.
Common Mistakes to Avoid
Even with a steak cooking chart, it’s easy to make mistakes that can ruin your steak. Here are some common pitfalls and how to avoid them:
-
Overcooking: Overcooking is the most common mistake when cooking steak. To avoid this, always use a meat thermometer and remove the steak from the heat when it reaches 5°F below your target temperature to account for carryover cooking.
-
Underseasoning: Underseasoning is another common mistake. Don’t be afraid to use plenty of salt and pepper. Seasoning should be done before cooking to allow the flavors to penetrate the meat.
-
Not Letting the Steak Rest: Cutting into a steak too soon after cooking will cause the juices to run out, leaving the meat dry. Always let your steak rest for at least 5-10 minutes before slicing.
-
Using the Wrong Cooking Method: Different cuts of steak are best suited to different cooking methods. For example, a tenderloin is best cooked quickly at high heat, while a tougher cut like flank steak benefits from slower, more gentlecooking technique, like slow-cooking or sous-vide, followed by a quick sear to ensure tenderness and flavor.
-
Cooking Cold Steak: Always bring your steak to room temperature before cooking. Cooking a steak straight from the fridge can lead to uneven cooking, where the outside is overdone while the inside remains undercooked.
-
Flipping Too Often: Resist the urge to flip your steak frequently. Ideally, you should flip your steak only once during cooking. This allows each side to develop a proper sear and locks in the juices.
-
Not Cleaning the Grill or Pan: Residue from previous cooking sessions can burn and stick to your steak, affecting its flavor and appearance. Always start with a clean grill or pan to ensure the best results.
Avoiding these common mistakes will help you achieve the perfect steak, cooked to your desired level of doneness, every time.
Advanced Techniques: Perfecting Your Steak with a Steak Cooking Chart
For those who want to take their steak-cooking skills to the next level, here are some advanced techniques that work hand-in-hand with your steak cooking chart:
1. Dry-Aging Your Steak:
-
Dry-aging is a process where beef is stored in a controlled, chilled environment for several weeks. This process allows the meat to lose moisture, intensifying the beefy flavor and making the steak more tender. You can dry-age steak at home, but it requires careful monitoring of temperature and humidity. After dry-aging, use your steak cooking chart to cook the steak to your desired doneness, knowing that the flavors will be more concentrated.
2. Basting with Aromatics:
-
Basting your steak with butter and aromatics like garlic, thyme, and rosemary during the last few minutes of cooking can add depth of flavor. Tilt the pan and use a spoon to continuously bathe the steak in the hot, flavored butter. This technique works particularly well when pan-searing.
3. Using a Cast-Iron Skillet:
-
A cast-iron skillet is ideal for achieving a perfect sear on your steak. It retains heat exceptionally well and distributes it evenly, which is crucial for cooking steak. Preheat the skillet in the oven, then move it to the stovetop for searing. Use your steak cooking chart to monitor the internal temperature.
4. Reverse Searing Thick Steaks:
-
For thicker cuts of steak, the reverse sear method is highly effective. Start by cooking the steak in a low oven or on the cooler side of the grill until it’s just below your desired doneness. Then, finish with a high-heat sear on the stove or grill to create a crust. This method ensures that the steak is evenly cooked from edge to edge.
5. Smoking Steaks:
-
Smoking adds a unique flavor to steaks that’s hard to replicate with other cooking methods. Smoke the steak at a low temperature until it reaches the desired internal temperature, then finish with a quick sear. The steak cooking chart is essential here to avoid overcooking while ensuring the steak absorbs the smoky flavor.
Exploring Different Cuts of Steak
Understanding different cuts of steak is essential for mastering steak cooking. Each cut has its own characteristics and best cooking methods. Here’s a quick guide to some of the most popular cuts:
-
Ribeye: Known for its marbling and rich flavor, the ribeye is a favorite among steak lovers. It’s best cooked over high heat to render the fat and create a crispy crust. Ribeye steaks are perfect for grilling or pan-searing.
-
Filet Mignon: This is the most tender cut of beef, with a buttery texture and mild flavor. Because it’s leaner than other cuts, it benefits from being cooked to medium-rare or medium doneness. Pan-searing and finishing in the oven is a common method for cooking filet mignon.
-
New York Strip: The New York strip is a well-marbled cut with a good balance of tenderness and flavor. It’s best cooked to medium-rare or medium on a grill or in a hot pan. The strip steak’s robust flavor pairs well with strong seasonings and sauces.
-
T-Bone/Porterhouse: These steaks feature both the tenderloin and the strip steak, separated by a T-shaped bone. They are larger cuts, making them ideal for grilling. The steak cooking chart is particularly useful here because the different muscles cook at slightly different rates.
-
Flank Steak: Flank steak is a lean cut that’s flavorful but can be tough if overcooked. It’s best when marinated and cooked to medium-rare. Slice flank steak against the grain to maximize tenderness. It’s ideal for grilling or broiling.
-
Sirloin: Sirloin is a versatile cut that’s less expensive but still delivers good flavor and tenderness. It’s suitable for grilling, pan-searing, or broiling, and it’s often used in steak salads or stir-fries.
Understanding the characteristics of each cut helps you choose the right steak for your meal and ensures that you use the most appropriate cooking method.
Pairing Steaks with the Perfect Sides and Sauces
A great steak is even better when paired with the right sides and sauces. Here are some classic and creative pairings to complement your steak:
1. Classic Sides:
- Mashed Potatoes: Creamy mashed potatoes are a classic steakhouse side. They balance the richness of the steak with their smooth texture.
- Grilled Vegetables: Grilled asparagus, zucchini, or bell peppers add a smoky flavor that complements the char on your steak.
- Creamed Spinach: This rich, velvety side dish pairs well with the savory flavors of steak.
2. Creative Sides:
- Sweet Potato Fries: For a sweet and savory contrast, serve your steak with crispy sweet potato fries.
- Quinoa Salad: A light, refreshing quinoa salad with herbs and citrus vinaigrette can balance the richness of a grilled steak.
- Brussels Sprouts with Bacon: Roasted Brussels sprouts with crispy bacon offer a savory, crunchy side that pairs well with steak.
3. Sauces:
- Béarnaise Sauce: A rich, buttery sauce with tarragon, Béarnaise is a classic pairing with tender cuts like filet mignon.
- Chimichurri: This vibrant, herbaceous sauce from Argentina adds a fresh, tangy flavor that cuts through the richness of a ribeye or New York strip.
- Red Wine Reduction: A red wine reduction with shallots and herbs adds a deep, savory flavor that complements the char of a grilled steak.
Pairing your steak with the right sides and sauces enhances the dining experience and brings out the best in your steak.
Frequently Asked Questions About Cooking Steak
1. How do I know when my steak is done without a thermometer?
- While using a steak cooking chart and thermometer is the most accurate way, you can also use the touch test. For example, a rare steak feels soft like the flesh between your thumb and forefinger when your hand is relaxed, while a well-done steak feels firm like the base of your thumb when your hand is clenched.
2. Should I oil the steak or the pan?
- It’s generally better to oil the steak rather than the pan. This ensures even coverage and helps prevent the steak from sticking. Use a high smoke point oil like canola or grapeseed oil.
3. Can I cook a frozen steak?
- Yes, you can cook a steak directly from frozen. It’s best to sear the steak first in a hot pan, then transfer it to a lower temperature oven to finish cooking. The steak cooking chart will be crucial to ensure it reaches the right internal temperature.
4. How long should I let my steak rest?
- Let your steak rest for at least 5-10 minutes after cooking. This allows the juices to redistribute throughout the meat, making it juicier and more flavorful.
5. Can I marinate my steak?
- Marinating is a great way to add flavor, especially to leaner cuts like flank steak or sirloin. However, avoid marinating for too long (more than 4-6 hours) as the acids in the marinade can break down the meat’s proteins too much, making it mushy.
Conclusion
Mastering the art of cooking steak to your preferred doneness is achievable with the right knowledge and tools. A steak cooking chart is an invaluable resource that helps you cook steak to the perfect internal temperature every time. By combining this tool with proper techniques, such as choosing the right cut, seasoning well, and allowing your steak to rest, you can elevate your steak-cooking skills to new heights.
Whether you’re grilling a ribeye, pan-searing a filet mignon, or broiling a New York strip, understanding the importance of internal temperature, cooking methods, and resting will help you achieve a steak that’s juicy, tender, and full of flavor. So, next time you’re preparing steak, keep your steak cooking chart handy, follow the tips outlined in this guide, and enjoy a perfectly cooked steak every time.